This will be a three part article on installing, configuring, securing and using Maik Koster’s Deployment Webservice.
- Part 1 – Installing and Configuring Deployment Webservices
- Part 2 – Securing Deployment Webservices
- Part 3 – Using Deployment Webservices
I’m a massive fan of Microsoft Deployment Toolkit (MDT) and use it for all customer deployments that don’t already have a modern and/or mature deployment model.
The Deployment Webservice is required to complement MDT for two main reasons:
- The Active Directory Net Framework classes are NOT supported in WinPE, which means that WinPE does not support the use of ADSI. So when you rebuild a device/image, you are unable to easily automate moving of the computer object to a build/staging OU before the Domain Join process. This is important when there is an existing object in Active Directory because you don’t want it to join to an existing object where unwanted Group Policy Objects may apply, that may in-turn break the build process, or at least make it unreliable.
- The MDT task sequence does not run as a Domain User with permissions to easily achieve this task. Whilst in MDT you can run a script as a different user, I don’t like using those configuration fields, as it means my task sequences end up being hard coded with credentials. I wanted a far more flexible approach so that I could pass it existing variables or derive them directly from the Task Sequence variables.
In PowerShell terms, [adsi] and [adsisearcher] are built into PowerShell V2 and later.
- [adsisearcher] – is a builtin type accelerator for -> System.DirectoryServices.DirectorySearcher
- [adsi] – is a builtin type accelerator for -> System.DirectoryServices.DirectoryEntry
Whilst Johan Arwidmark has blogged about adding ADSI support to WinPE, it is not supported by Microsoft. As a Consultant I don’t want to build an unsupported environment for my customers. So I choose to use Maik Koster’s Deployment Webservice instead. You also have the option of using Johan Arwidmark’s cut down version. Or you could write you own!
Update 6th October 2018. I was informed by a commenter that the download of Deployment Webservice was no longer available via the CodePlex site, as this has now been archived. So I’ve uploaded a copy to my web site and made it available here: Maik Koster Deployment Webservice v7.3 (963 downloads)
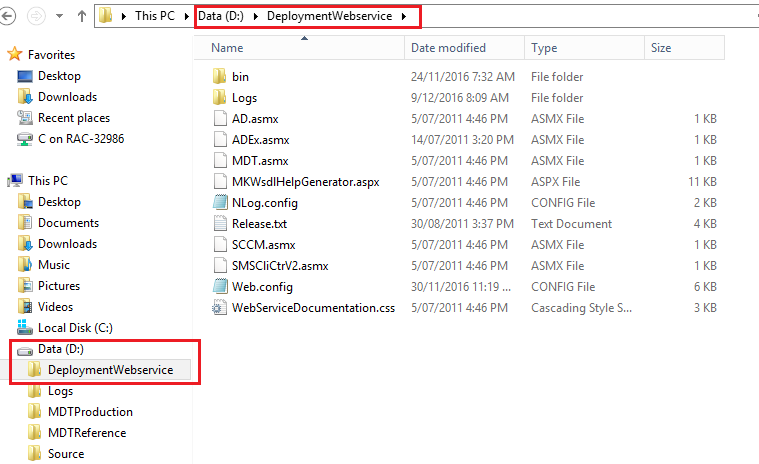
Extract to the root of the non-system drive of your MDT server. I place them on the same drive as the deployment shares in a folder called “DeploymentWebservice”
Install IIS as on the MDT server by using the following PowerShell script:
$ServicesToInstall = @(
"Web-Windows-Auth",
"Web-ISAPI-Ext",
"Web-Metabase",
"Web-WMI",
"NET-Framework-Features",
"Web-Asp-Net",
"Web-Asp-Net45",
"NET-HTTP-Activation",
"NET-Non-HTTP-Activ",
"Web-Static-Content",
"Web-Default-Doc",
"Web-Dir-Browsing",
"Web-Http-Errors",
"Web-Http-Redirect",
"Web-App-Dev",
"Web-Net-Ext",
"Web-Net-Ext45",
"Web-ISAPI-Filter",
"Web-Health",
"Web-Http-Logging",
"Web-Log-Libraries",
"Web-Request-Monitor",
"Web-HTTP-Tracing",
"Web-Security",
"Web-Filtering",
"Web-Url-Auth",
"Web-Performance",
"Web-Stat-Compression",
"Web-Mgmt-Console",
"Web-Scripting-Tools",
"Web-Mgmt-Compat"
)

Install-WindowsFeature -Name $ServicesToInstall -IncludeManagementTools
Note that this script is the same as Johan’s, with the addition of the “Web-Url-Auth” (URL Authorization) component. This is required to help us secure Webservices.
Configure IIS
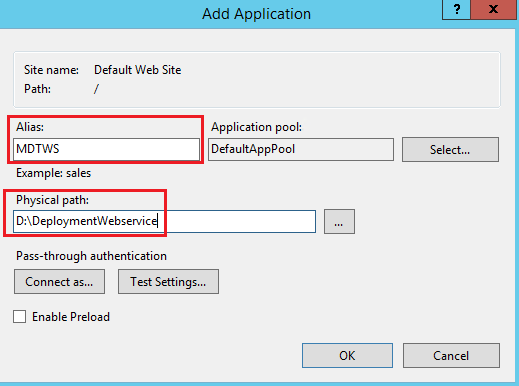
- Open IIS Manager
- Expand the “Sites” node
- Right click on “Default Web Site”
- Select “Add Application…”
- Alias: MDTWS
- Physical Path: D:\DeploymentWebservice
- Select OK
Now we create a new Application Pool for the Webservice. As per Maik’s instructions, it’s necessary to have your webservice running under a different User Account than your Default Websites for the following reasons:
- To have a clean separation between the webservice and your other Web sites.
- To securely give it the necessary permission it requires to do its job. By default, the webservice will use the User configured for the application pool of the webservice for authentication. You can also set this in the webservice application settings, which directly corresponds to the Web.config file. However, this is stored in plain text. Not good! IIS stores configuration of web sites, applications and pools in the applicationHost.config file located under the “C:\Windows\System32\inetsrv\config” folder. The password strings are encrypted automatically before they are written to the XML configuration files.
- Right click on Application Pools
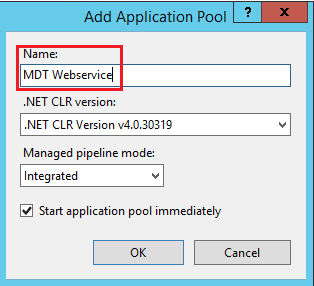
- Select “Add Application Pool…”
- Name: MDT Webservice
- Select OK
- Click on Application Pools
- Right click on “MDT Webservice” application pool
- Select “Advanced Settings…”
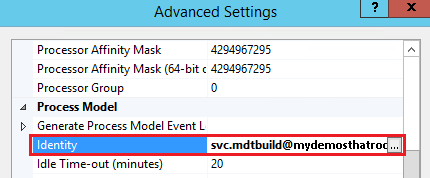
- Under the Process Model section select the Identity field
- Select the “…” button on the right hand side
- Select “Custom account”
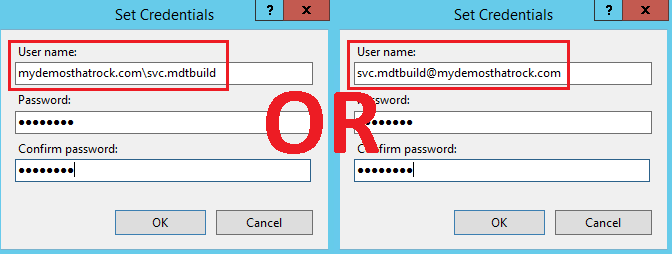
- Select “Set…”
- Enter the username and password of you MDT Domain Join Account
- Set the “User name” in the format of the UPN or “FQDNDomainName\Username”
- DO NOT use the “NetBIOSDomainName\Username” format, as it may be slow in large/complex environments.
- Select OK
Note the new Identity for the application pool
- Select OK
- Right click on the MDTWS application
- Select “Manage Application” > “Advanced Settings…”
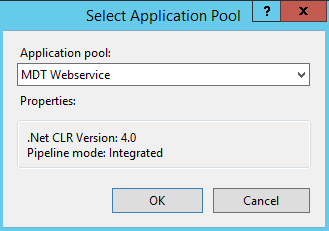
- Under the General section select the Application Pool field
- Select the “…” button on the right hand side
- Select the “MDT Webservice” application pool
- Select OK
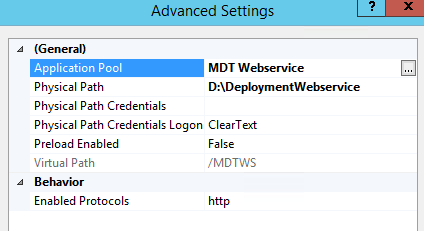
- Note the new Application Pool
- Select OK
The installation and configuration of the Webservice is now complete. Or is it? You see this is the point where most documentation for configuration of the Webservice finishes, including instructions from Maik and Johan. So when you start testing access you soon realise that by default anyone can access the Webservice and execute the functions. Woops! Therefore you need to lockdown the Webservice. This will be discussed and demonstrated in Part 2.
